
***
Night flyingAs the Timber’s fuselage and wing are hollow-core foam constructions it seems natural to install some led strips in there to light up the plane from the inside. Actually this is the best way to enlighten a foam RC aircraft! If the installation is done properly you see the plane sort of it is flying in a beam-light which is constantly pointing from all directions at the plane: ideally you see it somehow like in daylight (or even better) and hence you can fly it in a completely ordinary daytime-style (or even better 😀). Just saying: when you put sparkling leds on top of the models surfaces you will see at night a lot of dazzling light spots from the distance, but not the plane itself – what is somehow odd and not very helpful to get a good idea of the actual orientation of the aircraft.
***
FuselagePutting a led strip in the hollow fuselage is an easy task. At first try I was gluing two strips together: I thought this is necessary to ensure an even 360 degree glow. But I learned it is not! In a test flight I was experiencing a too bright glow of the fuselage (yes, it can be too bright, because your eyes are adapted to the darkness). I detached one strip which is now somehow or other lying in the inner back of the fuselage. Even so, the result is a smooth glow all around. But because the fuselage is massive in the front there isn’t much light coming out there, all the same for the vertical and horizontal stabilizer. Ok! You have to make reasonable compromises...
***
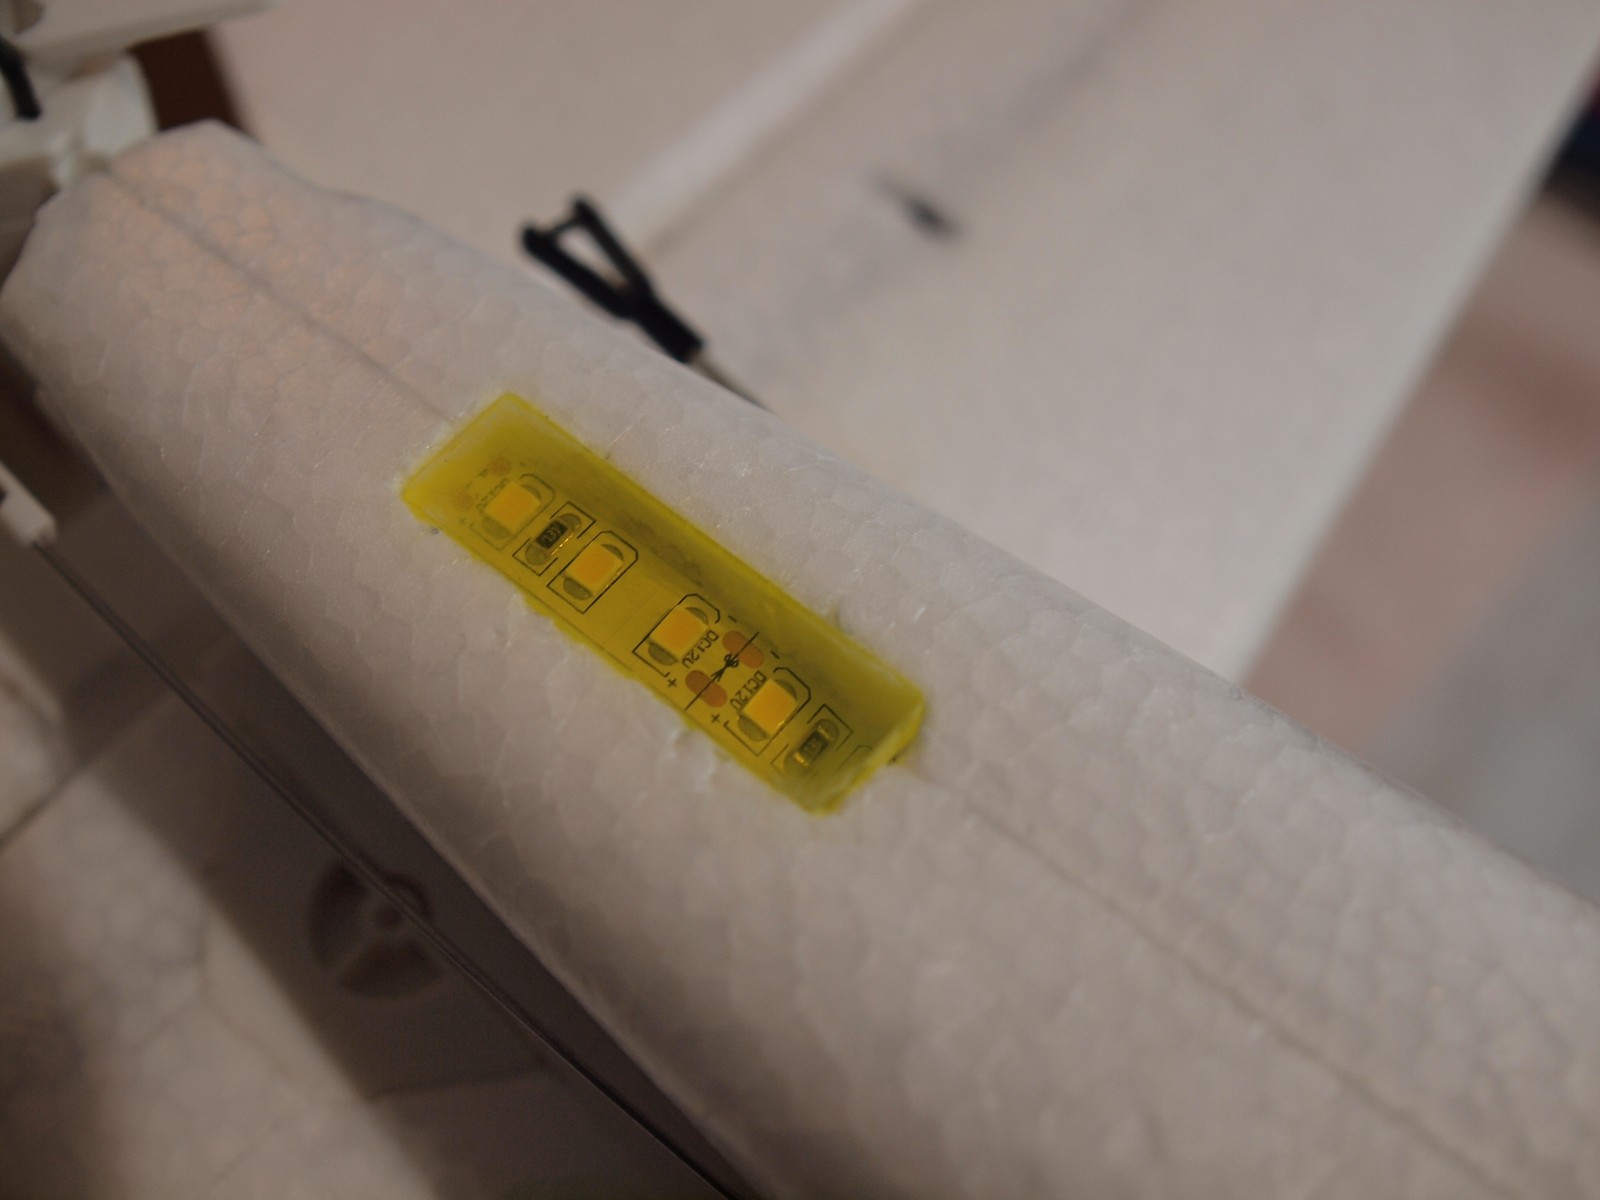
WingsWhen it come to light up the wing there are obviously more difficult things to do. The wing is much smaller in cross section as the fuselage, yet fortunately there are small cavities inside – yes, the wing is made of foam, but it is kind of built like a rib wing to make it lighter. The cavities length is around a third of the chord on the outer two thirds of the wing and less inwards. (I didn’t know that before actually light them up from inside - see picture below…). But how do you get the led lights inside these cavities?
After inspecting the wing closely in backlight (you will not figure out that much though...) and made some stitches with a small needle I decided to cut a small notch 35 mm after the leading edge to make space for one led strip to light up the caverns. This is important: if you bring the light inside the cavities then it comes to the outside easily because of the small wall thickness in these areas. Vice versa the luminous emittance of the leds is dampened out rapidly when blocked by thick foam walls. To make the notch I made two cuts with a special knife tool (to make sure to cut not to deep) and removed 1 mm of foam material to prevent the leading edge to bend up if the strip is squeezed into it. The wings torsional rigidity is lots of weakened if you make a cut like this into the surface - engineers can tell! But it will be ok again if you put some layers of tape there to bridge the notch. I did not glue the strip inside the notch! Why? Well, maybe I have to replace it sometimes, but anyway, it is kind of difficult to do it.
Don’t forget: There is the necessity to connect the wingspanels led strips to the battery as well. So you have two more connectors to plug in when mounting the wing. But who cares, the Timber has a massive cable tangle anyway.
***
Led strips*I used cold white (6500 K) strips with 120 leds per meter (led type: SMD 2835). The strip is 8 mm wide, 1 mm in thickness and weighs about 10 grams per meter. You can shorten a strip every third led. 12 volts are recommended for operation, thus a 3s LiPo battery fits perfectly.
***
Quick mathThe strips are connected with the 3s propulsion battery and directly jacked to the battery’s balancer pins. The current drain of the led strips together is about between 2 and 1,5 amps depending on the state of charge of the battery. After doing some quick math with the average current value you’ll see: that’s more than 70 minutes of light with a full 2200 mAh battery (which is the recommended size for the Timber). So you don’t have to worry much about power drain of the lights because the Timbers normal maximum flight duration before running out of juice is roughly 7 minutes. Hence you can expect a decrease in flight endurance with lights of about 10 %.
***
Possible modificationsAnother idea is to make the lights switchable at your transmitter. All you need therefore is an electronic relay from your hobby shop and a free channel at your receiver. Also a fuse for security reasons within the light circuit may be worth considering. If there is a short and the fuse blows, you have the standard position and landing lights still working, which should make an emergency landing feasible.
* Amazon link: https://www.amazon.de/gp/product/B01LX106HK/ref=oh_aui_detailpage_o05_s00?ie=UTF8&psc=1 ).
 |
| Wing and fuselage cavities are illuminated. |
 |
| A 1 mm wide notch is cut into the wings foam surface to make space for the led strip. |
 |
| "Special tool" for not cutting to deep into the wingpanel: a small balsa ledge glued to a cutter works as a depth gauge. |
 |
| Led strip in the wing. The notch ist closed with some layers of tape to make everything rigid again. |
 |
| Keep the tangle simple: the additional cable in the wing for the lights comes out at the root rib through an existing opening. |
 |
| You have to plug in four cables per side when mounting the wing. |
 |
| There is some "microscopic" soldering to do... |
 |
| Battery bay with balancer and propulsion jacks. |
 |
| Selfmade balancer connector. Enough for a maximum of 2 amps of electricity. |
 |
| Dummy jack for the light connector in the battery bay. Prevents it from moving around when not connected to the balancer port. |
 |
| Red lights flashing....on the top and bottom of the fuselage. |
 |
| The led strip at the rear edge of the fuselage is turned outwards to cause an extra bright single yellow spot light. |
 |
| Wing-tip strobes and beacons. |
 |
| Landing lights in the cowling: always on. |
 |
| Looking backwards into the fuselage. On the left side you see the led strip glued to the side. |
 |
| In the front the led strip goes around to brighten up things there. |
 |
| Looks cool! Ready for a nighttime adventure... |
Keine Kommentare:
Kommentar veröffentlichen